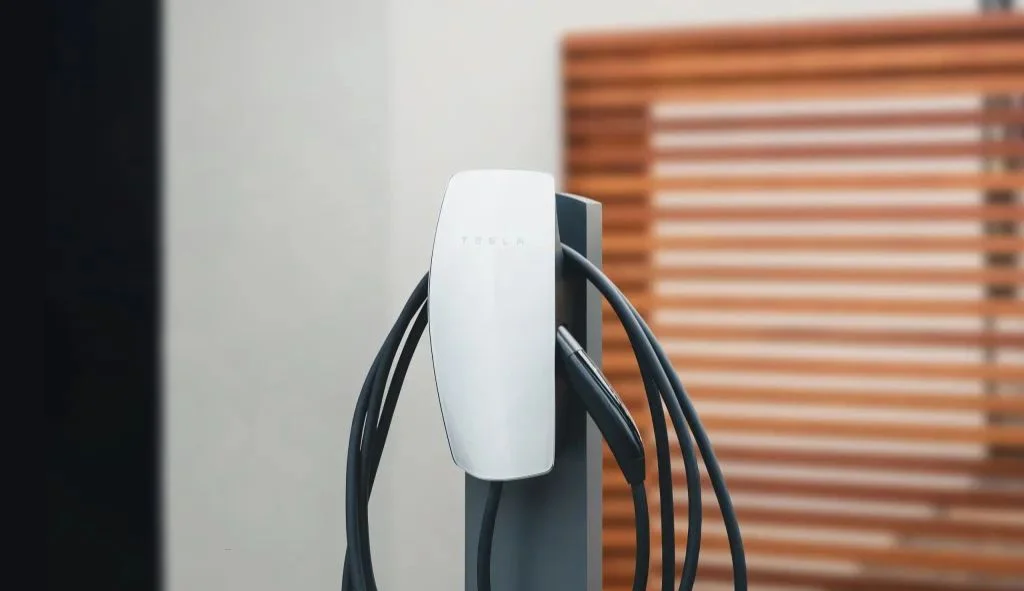
Tesla Wall Connectors can deliver up to 48 amps of power with a 60-amp circuit breaker, providing faster home charging for Tesla vehicles.
Understanding Tesla Wall Charger Amperage
When it comes to charging your Tesla at home, understanding the amperage of your wall charger is crucial for optimal performance and safety. The Tesla Wall Connector is designed to provide efficient and convenient charging for Tesla vehicles, but its amperage settings can significantly impact charging speed and electrical system requirements.
The Basics of Tesla Wall Connector Amp Ratings
The current generation Tesla Wall Connector (Gen 3) has a maximum output of 48 amps, which translates to approximately 11.5 kW of power at 240 volts. This is slightly different from the previous generation (Gen 2) Wall Connector, which was capable of higher amperage in some configurations.
The amperage rating of your Tesla Wall Connector determines how quickly it can charge your vehicle. Higher amperage means faster charging, but it also requires appropriate electrical infrastructure to support it. The Wall Connector is designed to be flexible, allowing installation on various circuit breakers with adjustable amperage settings.
According to Tesla’s specifications, the Wall Connector operates at a continuous current of up to 48 amps, which can provide approximately 44 miles of range per hour of charging for most Tesla models. However, the actual charging speed will vary depending on your vehicle model, battery state, and the electrical circuit the Wall Connector is connected to.
Recommended Circuit Breaker Sizes for Different Amp Settings
The National Electrical Code (NEC) requires that continuous loads (like EV charging) use only 80% of a circuit’s rated capacity. This means that if you want your Wall Connector to deliver its maximum 48 amps, you need a 60-amp circuit breaker (48 amps is 80% of 60 amps).
Here’s a breakdown of the recommended circuit breaker sizes for different amperage settings:
- 60-amp circuit breaker: Allows for maximum 48-amp charging
- 50-amp circuit breaker: Allows for maximum 40-amp charging
- 40-amp circuit breaker: Allows for maximum 32-amp charging
- 30-amp circuit breaker: Allows for maximum 24-amp charging
It’s important to note that the Tesla Wall Connector defaults to 48 amps unless configured otherwise during installation. This means if you have a 50-amp circuit breaker, you need to manually set the Wall Connector to deliver no more than 40 amps to comply with electrical code requirements.
Proper Installation and Configuration of Tesla Wall Connectors
Installing a Tesla Wall Connector requires careful consideration of your home’s electrical system and proper configuration of the device to ensure safe and efficient operation.
Setting the Correct Amperage for Your Electrical System
One of the most critical steps during installation is setting the correct amperage for your specific electrical system. The Wall Connector needs to be configured to match the circuit breaker it’s connected to, following the 80% rule mentioned earlier.
For example, if your home has a 100-amp electrical service and you’re installing a dedicated 50-amp circuit for your Wall Connector, you should configure the Wall Connector to operate at a maximum of 40 amps.
The configuration process differs slightly between the Gen 2 and Gen 3 Wall Connectors:
For Gen 2 Wall Connectors, the amperage is set using DIP switches inside the unit. You’ll need to consult the manual to set these correctly based on your circuit breaker size.
For Gen 3 Wall Connectors, the configuration happens during the commissioning procedure, which involves connecting to the Wall Connector’s Wi-Fi network and accessing a web page to set parameters, including the maximum amperage.
If the Wall Connector is not properly configured, it could lead to tripped circuit breakers or potential safety hazards. Many electricians may not be familiar with the default 48-amp setting of Tesla Wall Connectors, so it’s important to verify the configuration matches your circuit capacity.
Commissioning Process for Tesla Wall Connectors
The commissioning process for the Tesla Wall Connector Gen 3 involves several steps to ensure proper configuration:
- Complete the physical installation of the Wall Connector
- Connect to the Wall Connector’s Wi-Fi network using a mobile device
- Access the configuration web page
- Set the maximum current based on your circuit breaker size
- Configure any additional settings, such as power sharing if multiple Wall Connectors are installed
For the Gen 3 Wall Connector, Tesla has a dedicated app called Tesla Pros that installers can use for commissioning. Alternatively, the process can be completed by following the instructions in the installation manual.
During commissioning, you’ll have the opportunity to set the maximum current to match your electrical system. This is a critical step that should not be overlooked, as many users report issues when the Wall Connector is left at its default 48-amp setting on circuits that cannot support this level of current.
Charging Speeds and Amperage
The amperage setting of your Tesla Wall Connector directly impacts how quickly your vehicle will charge, measured in both kilowatts and miles of range added per hour.
How Amperage Affects Charging Speed
The charging speed of your Tesla is determined by the power delivered to the vehicle, which is calculated by multiplying voltage by amperage. With a standard 240-volt connection, the amperage setting becomes the primary factor controlling charging speed.
For example:
- At 48 amps: 240V × 48A = 11.5 kW
- At 40 amps: 240V × 40A = 9.6 kW
- At 32 amps: 240V × 32A = 7.7 kW
- At 24 amps: 240V × 24A = 5.7 kW
Higher amperage means more power and faster charging. However, the actual charging speed is also limited by your vehicle’s onboard charger. Most newer Tesla models have 11.5 kW (48 amp) onboard chargers, which means they can fully utilize a Wall Connector set to 48 amps. The Model 3 Rear-Wheel Drive has a 7.7 kW (32 amp) onboard charger, so it would not benefit from amperage settings higher than 32 amps.
It’s worth noting that some users report that higher amperage charging is more efficient, meaning you get more miles of range per kilowatt-hour of electricity used. While the difference may be small, this could be another factor to consider when deciding on your amperage setting.
Miles of Range Per Hour at Different Amp Settings
Tesla provides estimates of charging speed in terms of miles of range added per hour of charging. These estimates vary by model due to differences in vehicle efficiency and battery size:
For a Wall Connector on a 60-amp circuit breaker (48-amp charging):
- Model 3/Y: Approximately 44 miles of range per hour
- Model S/X: Approximately 34-30 miles of range per hour
For a Wall Connector on a 50-amp circuit breaker (40-amp charging):
- Model 3/Y: Approximately 37 miles of range per hour
- Model S/X: Approximately 29-25 miles of range per hour
For a Wall Connector on a 40-amp circuit breaker (32-amp charging):
- Model 3/Y: Approximately 30 miles of range per hour
- Model S/X: Approximately 23-20 miles of range per hour
These figures help you understand how different amperage settings translate to real-world charging speeds. For most Tesla owners, even the lower amperage settings provide sufficient charging speed for overnight charging. For example, at 24 amps, you can still add approximately 200 miles of range in an 8-hour overnight charging session for a Model 3.

Advanced Features and Considerations
Beyond basic amperage settings, Tesla Wall Connectors offer advanced features that can optimize your charging experience and manage electrical load effectively.
Load Management and Power Sharing
One of the most useful features of Tesla Wall Connectors is their ability to share power across multiple units. This is particularly valuable for homes with multiple Tesla vehicles or commercial installations.
The Gen 3 Wall Connector supports power sharing for up to 16 connected units, while the Gen 2 supported up to 4 units. When multiple Wall Connectors are linked together, they intelligently distribute the available power between the vehicles being charged.
For example, if you have a 100-amp circuit dedicated to two Wall Connectors, each could charge at 40 amps when only one vehicle is connected. When two vehicles are charging simultaneously, the Wall Connectors would automatically adjust to approximately 40 amps each.
Some installations also incorporate dynamic load management using the Neurio W2 Power Meter (for Gen 2) or built-in capabilities (for Gen 3). This system monitors the total electrical load of the house and automatically reduces the charging rate when other high-power appliances are in use, preventing circuit overloads and reducing the need for electrical service upgrades.
This feature is especially valuable for homes with 100-amp service or smaller electrical connections, as it allows for faster EV charging without the risk of overloading the main electrical panel.
Safety Considerations for High-Amperage Charging
When dealing with high-amperage EV charging, safety should be a top priority. Here are some important safety considerations:
- Always follow the 80% rule for continuous loads. Never set your Wall Connector to draw more than 80% of your circuit breaker’s rating.
- Use the proper wire gauge for your installation. For 60-amp circuits (48-amp charging), 6 AWG copper wire is typically recommended. Longer runs may require larger gauge wire to account for voltage drop.
- Ensure proper grounding of the Wall Connector.
- Consider the location of your Wall Connector. It should be protected from the elements if installed outdoors, and positioned to avoid damage from vehicle impact or other hazards.
- Regular inspection of the Wall Connector and charging cable can help identify potential issues before they become safety hazards.
- Be aware that the Wall Connector doesn’t automatically detect the size of the circuit breaker it’s connected to. This means it’s possible to have a misconfiguration where the Wall Connector is set to draw more current than the circuit can safely handle. Proper commissioning is essential.
Many users have reported using a 48-amp Wall Connector on a 50-amp circuit breaker, which technically violates the 80% rule. While this might work without immediately tripping the breaker, it’s not compliant with electrical codes and could lead to overheating or other safety issues over time.
Comparing Tesla Charging Options
Tesla offers several charging options for home use, each with different amperage capabilities and installation requirements.
Wall Connector vs. Mobile Connector vs. NEMA 14-50
The Tesla Wall Connector is just one of several charging options available to Tesla owners. Here’s how it compares to other common options:
Wall Connector:
- Maximum output: 48 amps (11.5 kW)
- Requires permanent installation
- Cost: $420
- Fastest home charging option
- Features Wi-Fi connectivity for updates and monitoring
- Supports power sharing
Mobile Connector (included with vehicle):
- Maximum output: 32 amps (7.7 kW) with 14-50 adapter
- Portable, can be taken with the vehicle
- Lower charging speed compared to Wall Connector
- No smart features or connectivity
- Good for occasional use or as a backup
NEMA 14-50 Outlet:
- Maximum output: 32 amps (7.7 kW) when used with Mobile Connector
- Requires installation of a 50-amp outlet
- Less expensive than Wall Connector installation
- Often used in RV parks and campgrounds
- No smart features or connectivity
For most Tesla owners who charge at home regularly, the Wall Connector offers the best combination of convenience and charging speed. However, if your vehicle has a 32-amp onboard charger (like the Model 3 Rear-Wheel Drive), the additional amperage capability of the Wall Connector won’t provide any charging speed benefit over a NEMA 14-50 setup.
Model-Specific Charging Capabilities and Limits
Different Tesla models have different onboard chargers, which limit the maximum charging speed regardless of the Wall Connector’s amperage setting:
Model S and Model X:
- Onboard charger: 11.5 kW (48 amp)
- Can utilize full 48-amp output from Wall Connector
- Charging speed: Approximately 30-34 miles of range per hour at 48 amps
Model 3 Performance and Model 3 Long Range:
- Onboard charger: 11.5 kW (48 amp)
- Can utilize full 48-amp output from Wall Connector
- Charging speed: Approximately 44 miles of range per hour at 48 amps
Model 3 Rear-Wheel Drive:
- Onboard charger: 7.7 kW (32 amp)
- Limited to 32-amp charging even with higher-amperage Wall Connector
- Charging speed: Approximately 30 miles of range per hour at 32 amps
Model Y:
- Onboard charger: 11.5 kW (48 amp)
- Can utilize full 48-amp output from Wall Connector
- Charging speed: Approximately 44 miles of range per hour at 48 amps
Understanding your vehicle’s onboard charger capabilities helps you make an informed decision about the appropriate amperage setting for your Wall Connector. There’s no benefit to configuring your Wall Connector for 48-amp charging if your vehicle can only accept 32 amps.
Frequently Asked Questions
What is the default amperage setting for a Tesla Wall Connector?
The default setting for a Tesla Wall Connector is 48 amps. This requires a 60-amp circuit breaker to comply with the 80% rule for continuous loads. If your Wall Connector is installed on a smaller circuit, it must be configured accordingly during installation.
Can I charge at 48 amps with a 50-amp breaker?
No, you should not charge at 48 amps with a 50-amp breaker. According to electrical codes, continuous loads (like EV charging) should not exceed 80% of the circuit breaker rating. For a 50-amp breaker, the maximum continuous load should be 40 amps.
How do I change the amperage setting on my Tesla Wall Connector?
For Gen 2 Wall Connectors, you need to set DIP switches inside the unit according to the manual. For Gen 3 Wall Connectors, you connect to the unit’s Wi-Fi network and access a web-based configuration page during the commissioning process.
Does higher amperage charging damage the battery?
No, charging at higher amperage (up to the maximum supported by your vehicle) does not damage the battery. Tesla vehicles are designed to handle their maximum charging rate without negative impacts on battery health.
What wire size do I need for a 48-amp Tesla Wall Connector?
For a 48-amp Tesla Wall Connector (on a 60-amp circuit), 6 AWG copper wire is typically recommended. For longer runs, a larger gauge wire might be needed to minimize voltage drop. Always consult with a licensed electrician to determine the appropriate wire size for your specific installation.
Can I install a Tesla Wall Connector myself?
Tesla recommends that Wall Connectors be installed by a licensed electrician. The installation involves high-voltage electrical work and must comply with local building codes and regulations. Improper installation could create safety hazards or damage your vehicle.
How many Wall Connectors can share power?
The Gen 3 Wall Connector can share power with up to 16 units, while the Gen 2 supported up to 4 units. This feature allows multiple vehicles to charge simultaneously while intelligently distributing the available electrical capacity.
Is a 60-amp circuit necessary for a Tesla Wall Connector?
A 60-amp circuit is necessary only if you want to utilize the full 48-amp capability of the Wall Connector. The Wall Connector can be installed on smaller circuits (50A, 40A, etc.) but must be configured to limit the maximum current accordingly.
How much does it cost to install a Tesla Wall Connector?
The Tesla Wall Connector itself costs $420. Installation costs vary widely depending on your location, the complexity of the installation, and whether electrical panel upgrades are needed. Simple installations might cost $500-$1,000, while more complex installations requiring panel upgrades could cost $2,000 or more.
Does charging speed affect electricity cost?
The amperage setting itself doesn’t directly affect the electricity cost per kilowatt-hour. However, some users report slightly higher efficiency at higher amperage settings, which could marginally reduce the overall cost to charge. Time-of-use electricity rates and utility demand charges are much more significant factors in charging costs.