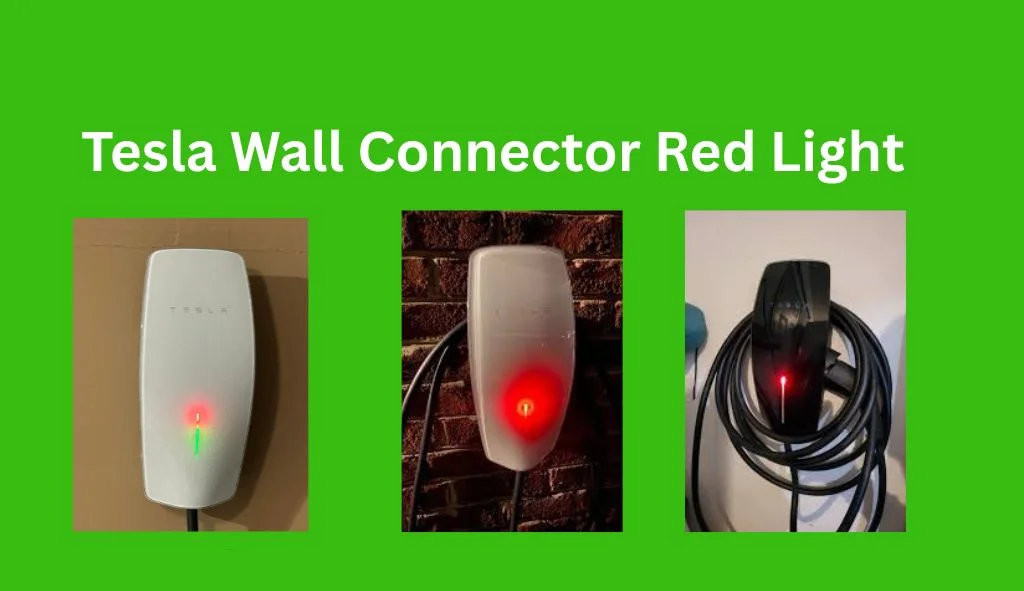
A red light on your Tesla wall charger indicates a fault in the charging system. The specific blinking pattern helps identify the issue and determine the appropriate troubleshooting steps.
Understanding Tesla Wall Charger Red Light Patterns
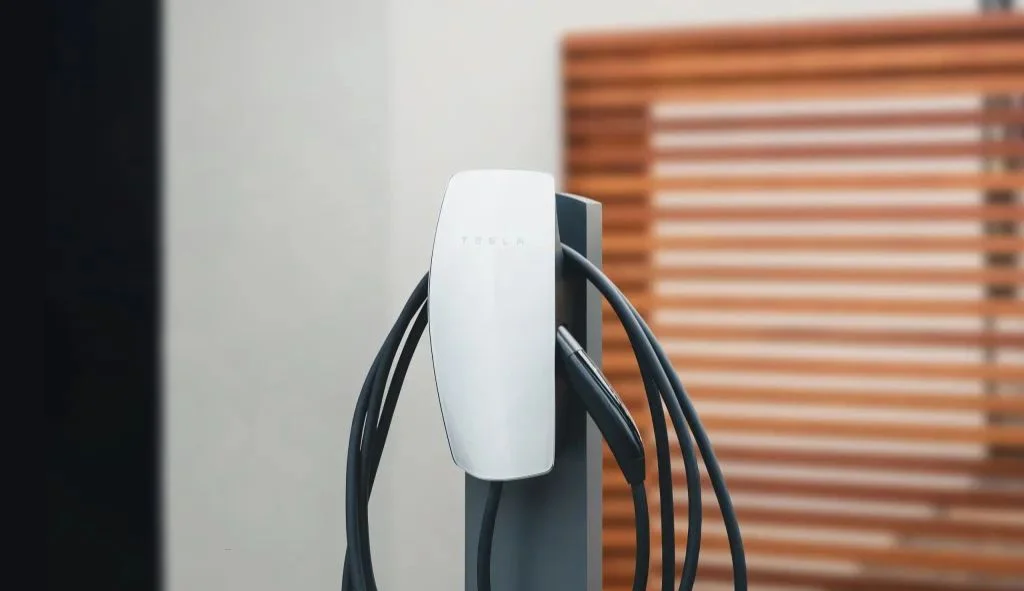
If you own a Tesla electric vehicle, you likely rely on your wall charger for daily charging needs. Under normal circumstances, your Tesla wall charger displays green lights when operational. However, if you notice a red light, either solid or blinking, it signals that something requires attention.
Normal Operation vs. Error Indicators
During normal operation, your Tesla wall charger should display the following light patterns:
- All green lights briefly illuminate for one second during startup
- All green lights remain on when powered but not charging
- Green lights stream sequentially when charging is in progress
When the wall charger detects an issue, the red light will either remain solid or blink in specific patterns. Each pattern corresponds to a particular problem that needs to be addressed.
What Each Red Light Pattern Means
Tesla has programmed their wall chargers to communicate issues through distinct red light patterns. Understanding these patterns is the first step in resolving the problem:
- No lights: Indicates a power supply issue where charging is disabled
- Solid red: Signals an internal fault that has disabled charging
- One red blink: Indicates a ground fault circuit interruption due to an unsafe current path
- Two red blinks: Shows a ground assurance fault or high ground resistance
- Three red blinks: Signals high temperature detection that may limit or disable charging
- Four red blinks: Indicates loss of internet connection, disabling online features
- Five red blinks: Shows a power-sharing communication issue, reducing charging speed
- Six red blinks: Indicates overvoltage or poor grid quality detection, disabling charging
- Seven red blinks: Signals vehicle overcurrent detection
Each blinking pattern requires a specific approach to troubleshooting, which we will explore in detail.
Troubleshooting One or Two Red Blinks
One or two red blinks on your Tesla wall charger typically relate to ground fault issues, which are electrical safety concerns that need prompt attention.
Ground Fault Circuit Interruption (One Blink)
A single red blink on your Tesla charger indicates a ground fault circuit interruption (GFCI). This safety feature protects users from electric shock by detecting when electricity takes an unintended path to ground. When the GFCI monitor detects an imbalance, it quickly shuts off power to prevent potential injuries.
This issue often occurs due to:
- Damaged charging cables
- Water or moisture in the charging system
- Debris in the charging port
- Faulty connections
Ground Assurance Fault (Two Blinks)
Two red blinks indicate a ground assurance fault or high ground resistance. This happens when the electrical system cannot ensure proper grounding, often due to issues with the ground connection in your charging system.
Steps to Fix Connection Issues
For one or two red blinks, try these troubleshooting steps:
- Check the charging connection. Ensure the charging cable is securely plugged into both the Tesla vehicle and the charging station.
- Inspect for damage. Look for any visible signs of wear on the charging cable, such as frayed wires or bent connections.
- Disconnect and reconnect. Unplug the charging cable from both the vehicle and the charging station, wait a few seconds, and then reconnect.
- Check for error messages on your Tesla’s display screen, which may provide additional information about the charging issue.
- If problems persist, contact an electrician to address the ground issue. For GFCI problems, the electrician should inspect the handle, cable, wall connector, and vehicle charge port for damage or signs of water. They should also verify that the earth ground is not directly connected to a conductor wire in the branch circuit.
- For ground assurance faults, an electrician should verify that the wall connector is properly grounded. The ground connection must be bonded in the upstream power supply for proper operation.
Troubleshooting Three Red Blinks
Three red blinks on your Tesla wall charger indicate a temperature-related issue that could potentially limit or disable charging.
Overheating Issues
When your wall charger displays three red blinks, it has detected high temperatures within the charging system. Charging normally generates some heat, but excessive heat can damage components and create safety hazards. Overheating can occur due to:
- Ambient temperature being too high
- Poor ventilation around the charger
- Incorrect wire sizing
- Loose connections at the terminal block
- Extended high-power charging sessions
How to Check for Temperature Problems
If you encounter three red blinks, follow these steps:
- Check the faceplate and cable handle for excessive warmth. If they feel unusually hot, stop charging immediately.
- Ensure proper ventilation around the wall charger. Remove any objects that might block airflow.
- Allow the charger to cool down before attempting to use it again.
- If the problem persists, have an electrician remove the wall connector from the wire box to verify that the conductors used are correctly sized and that the terminal block is torqued to specification.
- The electrician should also check that all connections are secure and that there is no evidence of overheating at connection points.
Proper installation with appropriately sized wiring is crucial for preventing overheating issues. If heat problems continue despite these measures, the wall charger may need to be replaced.
Troubleshooting Four or Five Red Blinks
Four or five red blinks on your Tesla wall charger relate to connectivity issues that can affect the charging experience.
Internet and Wi-Fi Connection Issues (Four Blinks)
Four red blinks indicate that the internet connection has been lost, disabling online features of your wall charger. This doesn’t necessarily prevent charging but limits functionality like remote monitoring and control.
Possible causes include:
- Wi-Fi router issues
- Signal interference
- Changed network passwords
- Router positioning problems
Power-Sharing Communication Problems (Five Blinks)
Five red blinks indicate a power-sharing communication issue, which will reduce charging speed. If you have multiple Tesla wall connectors set up to share power, they need to communicate with each other to distribute available power effectively.
When this communication is interrupted, the system defaults to a lower charging rate as a safety measure.
How to Reset Network Settings
For four or five red blinks, try these solutions:
- Check your internet connection. Verify that your Wi-Fi network is functioning correctly.
- Remove potential interference. Look for objects that could be interfering with the Wi-Fi signal strength in the area of the wall charger.
- Restart your router. Power cycling your router can resolve many connectivity issues.
- Reconnect to Wi-Fi. If you’ve recently changed your Wi-Fi password, you’ll need to update this in the wall connector settings.
- Follow the commissioning process on your mobile device to update Wi-Fi settings or re-link wall connectors for power sharing. This typically involves connecting to the wall connector’s own Wi-Fi network and accessing its configuration page.
- Reposition your router or consider using a Wi-Fi extender if signal strength is consistently poor in the area where your wall charger is installed.
Maintaining a stable internet connection ensures that your Tesla wall charger operates with all features enabled and at optimal efficiency.
Troubleshooting Six Red Blinks
Six red blinks on your Tesla wall charger indicate electrical supply issues that can prevent charging altogether.
Voltage and Power Quality Issues
When your wall charger blinks red six times, it has detected overvoltage or poor grid quality. This means the voltage supplied to the wall connector exceeds the acceptable range (typically 200-240 volts for most Tesla chargers) or that the electrical grid is experiencing fluctuations, surges, or other quality issues.
These problems can damage both your wall charger and your vehicle if not addressed promptly. Common causes include:
- Grid instability
- Power surges
- Improper electrical installation
- Issues with the main electrical panel
- Problems with the circuit breaker
How to Check Electrical Supply
If you encounter six red blinks, follow these steps:
- Verify that your power supply is within the nominal 200-240 volt range. This typically requires an electrician with proper testing equipment.
- Have an electrician remove the wall connector from the wire box and check voltage readings at the terminal block using a multimeter.
- Record voltage readings between: L1 to L2/N, L1 to Ground, and L2/N to Ground. These readings will help identify if the issue is with your home’s electrical system or the power grid.
- If the issue is with your home’s electrical system, the electrician may need to make repairs or adjustments to ensure proper voltage.
- If the problem seems to be with the grid, contact your utility company to report poor power quality.
- In some cases, installing a voltage regulator or surge protector might help protect your charging system from grid irregularities.
Remember that electrical issues can be dangerous and should be handled by qualified professionals. Never attempt to measure voltage or make electrical repairs unless you are properly trained and certified.
Troubleshooting Seven Red Blinks
Seven red blinks on your Tesla wall charger indicate that vehicle overcurrent has been detected, which can affect the charging process and potentially damage components.
Vehicle Overcurrent Issues
When your wall charger displays seven red blinks, it means the charging system has detected that the current flowing to the vehicle exceeds safe limits. This safety feature prevents potential damage to both the charger and your Tesla.
Vehicle overcurrent can occur due to:
- Vehicle charging settings set too high
- Vehicle battery management system issues
- Compatibility issues with non-Tesla vehicles
- Fluctuations in the electrical supply
- Internal vehicle electrical problems
Adjusting Charge Current Settings
If you encounter seven red blinks, try these solutions:
- Reduce the vehicle’s charge current setting through your Tesla’s touchscreen or mobile app. Lowering the amperage can often resolve overcurrent issues.
- Wait a few minutes after adjusting settings to see if the issue resolves itself.
- If the problem persists and you’re driving a Tesla, record your vehicle’s VIN and the approximate time of the fault, then contact Tesla support for assistance.
- If you’re charging a non-Tesla vehicle with an adapter, contact that vehicle’s manufacturer as the issue may be related to compatibility.
- Check for any software updates for your vehicle, as these can sometimes address charging-related issues.
- Have an electrician verify that the electrical supply to your wall charger is stable and appropriate for the charging rate you’ve selected.
Proper match between your charging settings and your electrical infrastructure is key to preventing overcurrent situations.
When to Call a Professional
While many Tesla wall charger issues can be resolved with basic troubleshooting, some situations require professional assistance.
Signs of Serious Electrical Problems
Contact an electrician immediately if:
- You experience repeated issues despite following troubleshooting steps
- You notice burning smells, unusual noises, or physical damage to the charger
- Your circuit breaker trips repeatedly when charging
- The wall charger displays one, two, or three red blinks that don’t resolve with basic troubleshooting
- You’re uncomfortable working with electrical equipment
An electrician can perform more advanced diagnostics, including:
- Checking the earth-ground wiring
- Ensuring the size of conductors meets specifications
- Verifying proper terminal block connections
- Testing voltage levels throughout the system
- Inspecting circuit breakers and main panel connections
Contacting Tesla Support
Contact Tesla support if:
- The wall charger displays a solid red light that doesn’t resolve by resetting the circuit breaker
- You’ve verified electrical connections are correct but problems persist
- The charger is under warranty and appears to have an internal fault
- You need assistance with software or firmware updates
- You need help interpreting error messages on your vehicle’s display
When contacting Tesla support, have the following information ready:
- A short video of the wall connector LED activity during the faulted state
- A photo of the wall connector’s part number and serial number (located on the side label)
- The timeframe when the issue was observed
- The VIN of the vehicle that was plugged into the wall connector during the fault
- Photos of any error messages displayed on the vehicle’s screen
Tesla support can be reached through their website, mobile app, or by phone at (888) 765-2489 or (877) 961-7652.
Preventive Maintenance for Tesla Wall Chargers
Regular maintenance can help prevent many common issues with Tesla wall chargers and ensure reliable charging for your vehicle.
Regular Inspection Tips
Perform these checks regularly to maintain your wall charger:
- Visually inspect the charging cable for signs of wear, cuts, or damage
- Check the charging handle for cracks or other physical damage
- Keep the charging port on your vehicle clean and free of debris
- Ensure the wall charger remains clean and free of dust, especially around vents
- Verify that all mounting hardware remains tight and secure
- Check that the charger isn’t exposed to extreme temperatures or direct sunlight
- Ensure proper drainage around outdoor installations to prevent water accumulation
Keeping Your Charging System in Good Condition
Follow these best practices for long-term reliability:
- Avoid dropping the charging handle or allowing the cable to be driven over
- Don’t stretch the cable beyond its natural length
- Store the charging handle in its holster when not in use
- Keep the circuit breaker labeled for easy identification during power issues
- Maintain records of any issues or maintenance performed
- Keep firmware updated by connecting the wall charger to Wi-Fi
- Consider having an electrician perform an annual inspection of your charging installation
Proper maintenance extends the life of your charging equipment and helps prevent unexpected downtime.
Frequently Asked Questions
How do I reset my Tesla wall charger?
To reset your Tesla wall charger, turn off the circuit breaker connected to the charger, wait 5 seconds, and then turn it back on. For some models, you can also press and hold the reset button on the side or underside of the charger for 2-3 seconds until the light changes to green.
Can I use my Tesla with a red light on the wall charger?
No, you should not attempt to charge your Tesla if the wall charger is displaying a red light. The red light indicates a fault condition that could potentially damage your vehicle or create a safety hazard. Address the issue before continuing to charge.
Does weather affect Tesla wall charger performance?
Yes, extreme weather conditions can affect your Tesla wall charger. Excessive heat can trigger overheating warnings (three red blinks), while moisture from rain or snow can cause ground faults (one red blink). Ensure your charger is properly installed for your climate conditions.
How long do Tesla wall chargers typically last?
With proper installation and maintenance, Tesla wall chargers can last 7-10 years or more. They’re designed to withstand daily use and outdoor installation (with proper protection). Regular inspection and care can extend their lifespan considerably.
Can Tesla wall chargers be repaired, or do they need replacement?
Some issues with Tesla wall chargers can be repaired, particularly those related to electrical connections, breakers, or installation factors. However, internal faults often require replacement of the unit. Tesla wall chargers come with a 4-year warranty, so contact Tesla if your unit is still covered.
Why did my Tesla stop charging overnight?
If your Tesla stopped charging overnight, check for red lights on the wall charger. Common causes include power outages, circuit breaker trips, ground faults, or communication errors between the vehicle and charger. The vehicle display or mobile app may provide information about why charging stopped.
Can I install a Tesla wall charger myself?
Tesla strongly recommends professional installation by a licensed electrician. Improper installation can lead to many of the red light errors discussed in this article, as well as potential safety hazards. Professional installation also ensures compliance with local electrical codes.